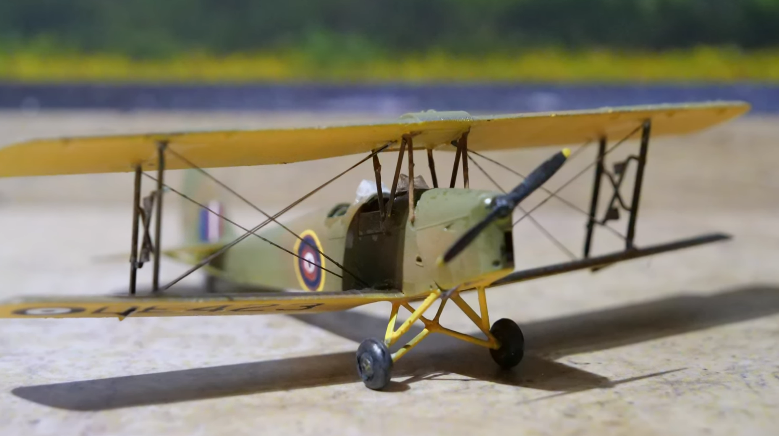
The Tiger Moth is a stalwart of history; one of the tried and true that has remained many people’s first flight…all be it as a luxury experience these days. Nevertheless it remains a core part of many people’s modelling childhoods and developments – often their first experience with a biplane and rigging.
For me, this kit was one that I’d meant to do for ages but never got round to. When my colleague and friend Cpt VFC kept going on about the Moth – their favorite plane arguably – I finally caved. I almost went for the pure yellow one, but ultimately settled on this Norwegian example due to decals from Vingtor Decals being on sale and providing a very different alternative.
Out of the options I was fascinated by the RAF Norwegian example – which featured a unique roundel rather than the Norwegian stripes. It also gave me an opertunity to do camo and yellow all on the same model – neat!
The construction of the kit is relatively straight forward. Pay attention in the cockpit as there are a lot of small parts and details that are easy to overlook or just forget as I did. I also couldn’t be bothered detailing it that much because, and say it with me, if you can’t see it then it’s ok to ignore it.
For those of you still reading (as I imagine some left after I exposed myself as a phoney modeller, missing bits never to be seen again) the remainder of the model went together smoothly too. The only part I found didn’t hang well was the rear hook. In hindsight I should have left this until the end as undercarriage is always my nemesis. I ended up replacing mine with a bit of metal deformed to shape something like a rear skid.
Overall I enjyed the experiance of making this kit, and would do it again. I must do a pure yellow one a la the old Airfix box. Before that thoyugh, we should discuss the worst part of the construction – rigging. I used a hack stolen from the aforementioned Cpt VFC which I did a video on (see below). This has, to this day, remained my preference for sprues. I’ve got a bit less impatient though so the clumps of glue are much bigger now sadly.
Once the rigging was done it was time to paint! This was done using Lifecolour’s paints – using their white primer for the underneath sections and then their Panzer Grey for the top. I used a very roughly 40/60 mix of Finnish Airforce Yellow and Matt Yellow from Lifecolour to get what I felt was the right trainer yellow. I then used RAF Earth Brown and RAF Dark Green. Initially basing in Green and then doing a random camo design based on the vibe of the example scheme. As this was a mojo build it was really important that I just had fun with it rather than worrying about details.
Applying the decals I found them very fragile. It could be my error, but they just didn’t have the flex of Cartograph or other large scale decal manufacturers. I’ve built many decals from Dekls without issue, so the excuse of being a small brand isn’t going to fly with me!

The decals did go in, even with some tears on the tail. I painted them in to the best of my ability and was really thrilled with how unique this scheme came out. Even with my impatience causing unheard of failure with the rigging. I would like to point out that I left the extra sprue parts on the bits between the struts in error. For some reason I thought that was how they were, despite seeing this plane fly hundreds of times. We’re all human!
Buy or Fly?
Airfix kit:
This is an easy buy from me. Especially when it is so frequently available in Lidl for £5.00 or so. It goes together beautifully and is a great introduction to the wacky world of biplanes and rigging!
Vingtor Decals:
Despite my issues I still thing these give a really unique insight into a rare subject matter. Whilst they are not the best decals I’ve used, I still enjoyed them and so I would still recommend them thoroughly.

Leave a Reply