Note: This article is a dual review of both the KP L-39 and Kopro’s Brietling Display team decals
The L-39 was a plane that grew from former Czechoslovakia (now Czechia / Czech Republic) as a successor to the L-29 Delphin that was adopted USSR-wide. A much more modern and sleek aircraft, the L-39 became known a a reliable workhorse and also a private aerobatics aircraft.
It remains hard to believe that this aircraft was developed in the 60s, and entered service with the Czechoslovak airforce in 1972. Since then the aircraft has spread accrross the globe both privately and militarily. Newer versions (known as the L-39 NG) feature a wet-wing and so dispose of the types need for the iconic wingip tanks. Another incarnation is the L-159 Alca which is a more aggressive development of the L-39.
The aircraft has become the steed of some well loved display teams such as the Baltic Bees of Estonia, the White Albatross of Slovakia, and the Brietling Team….obviously a private venture.
The Kit
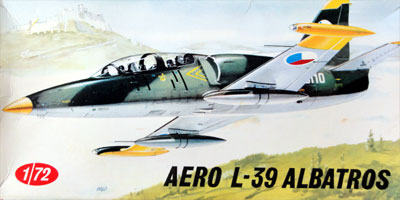
KP Models Aero L-39 Albatross
The kit is produced by KP Plastikovy. This is a company that, from what I can see, has 40 years of history that sadly seems to be inactive at the moment (at least according to their Facebook page). It is noted that they are now having their kits ‘produced’ by SMER…however it is unclear if this means SMER now just owns their toolings as a whole.
Either way, the kit I have is dated by the fact it was made in Czechoslovakia – I cannot find a year listed on the kit. It’s age is evident in the sheer volume of flash as well – in some instances (aka the wheels) I left it as I was incredibly lazy. On the rest of it, I just cut and sanded it off.
The kit is extremely basic. It consists of four sprues (3 plastic, 1 clear), all of which are un-numbered and have some parts that are ambiguous. I had one or two parts that I was just completely unsure of (the engine intake flat section, wheel bay cover – before I’d used all the other parts).
Construction is very easy. Cockpit consists of the most parts of any section (x2 seats, x2 control columns, x2 control panel, and the main basin? is that what you call it? We’re going with basin). The fact that the cockpit has the most parts shows the simplicity on display.
The rest as you can see is very linear. You can construct the entire model in a matter of minutes. For this reason it’s very satisfactory and a good weekend build, but I would not recommend it for new starters for one reason….see the ‘buy of fly’ section of this article for my conclusive thoughts.
The Decals
Kopro Breitling Display Team (Old/Blue Scheme)
I need to start with a disclaimer – due to user error I damaged 2 sections of my decals. But my god I love these decals.
I ordered these from the Bay of E but you can find these decals in a lot of different outlets. These are older and seem to be easier to get than the new Breitling scheme (no, I don’t understand why either). It comes as one sheet, but with 2 A4 pages of reference/instruction sheets – yes, they’re colour too! It has a paint guide too – I went with Humbrol Gloss 14, thinned with Aqua Color Thinner…this may or may not have been a mistake, but we survived it.
The decals are super resilient and malleable. You can pull them around and there’s no real worry of them breaking – this only happens when you don’t wait for one side to fully cure/try and end up ripping it from the model…or by trying to put it somewhere it just doesn’t fit….so naturally I have done both those things.
The most impressive element however is the pigmentation. OH. MY. GOD. How the hell have they’ve made yellow decals that manage to have no issue asserting their vibrant nature on top of a gloss navy finish….like…is this some form of witchcraft because I’d like to know.
If you mess up, like I did, use Revell Aqua color 12 – it’s not an exact match, but thinned out enough it blends. I just accepted that I’m an average model maker – not a pro – and therefore it will not look 100% perfect. But you know what, I still think it looks snazzy!
Buy or Fly?
Kit: The kit has one glaring issue that is a product of time rather than of manufacture – price. The price of this kit is anywhere between £10-15 and there is no way it is worth that. I got mine second hand for £6/€7 including postage…it made sense. I had the decals already and just needed a platform for them.
Do I regret buying the kit? No. It was a unique part of modelling history and really cool to see a kit produced in a country that has progressed into 2 separate countries. But would I recommend it? No – fly far away from this one and grab the Eduard kit that is around the same price in most cases.
Decals: As if you didn’t know from my discussion about the decals earlier in this article I wholeheartedly say Buy. Some sections didn’t perfectly fit my model, but I believe that’s because it wasn’t designed to fit this exact tooling…but even so it wasn’t really much of an issue anyway. If you’re buying aftermarket decals you’re probably already used to ‘making things fit.’ If not, this is a great one to learn that skill!
Leave a Reply